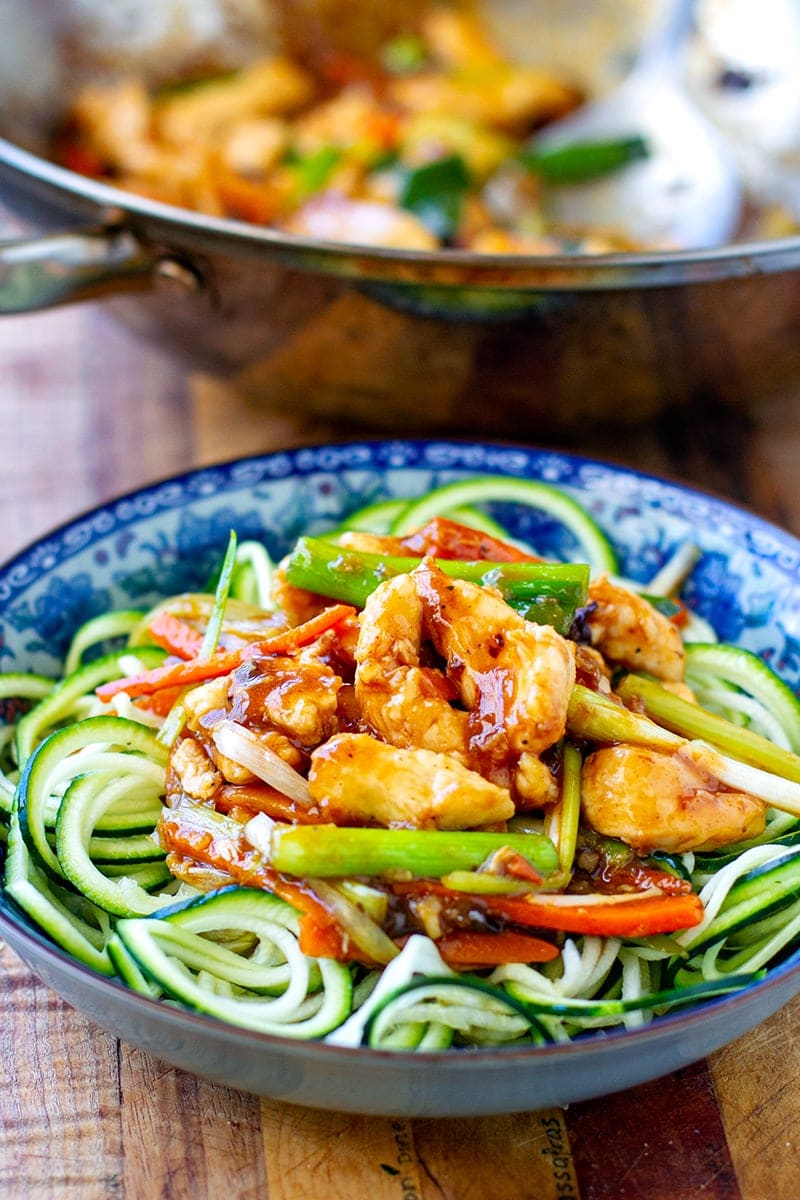
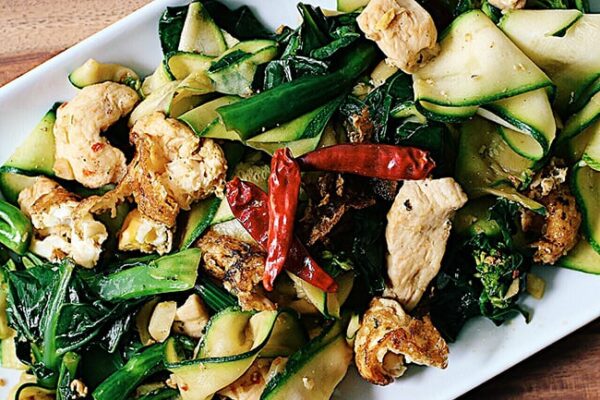
This paleo-friendly Mongolian chicken is based on the classic Chinese takeout favourite but is free of gluten, grains, MSG and refined sugar. Served over zucchini noodles, this healthy chicken recipe makes for a tasty, nutritious meal. See step-by-step photos below the recipe card.
Mongolian beef is a popular Chinese-American/Chinese-Australian dish that actually originated from Taiwan where Mongolian BBQ became popular a few decades ago. The recipe has nothing to do with authentic Mongolian cuisine but the name has stuck and it’s become one of the most loved dishes.
If you’ve tried the beef version, you would know that the dish is all about the brown sauce. It has that rich sweet, salty and umami flavour that’s derived from combining hoisin sauce and soy sauce with the additions of chili, garlic and in many cases extra sugar.
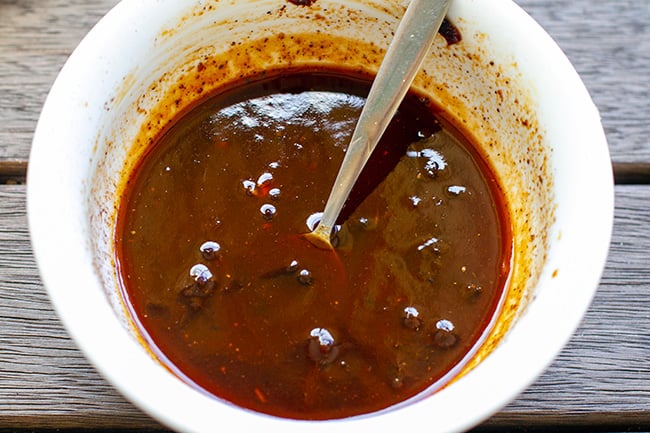
Paleo Mongolian Stir-Fry Sauce
As an experienced recipe developer, you often know what something will taste like by looking at the recipe ingredients. When searching for paleo-friendly Mongolian beef recipes I came across quite a few but upon checking the sauce ingredients, I knew (even without trying) that they just wouldn’t taste close to the real thing.
I really wanted to develop something that would come close to what I know as Mongolian beef sauce. Also, I wanted to change up the protein to chicken but you can, of course, use the same sauce with beef, lamb, pork or veggies. I’ve already developed a paleo-friendly hoisin sauce before, so I started working off that and researched the ingredients in the Mongolian beef sauce to see what I can use instead that’s more compliant.
I was quite pleased with the flavour and texture of the sauce. In addition to the more predictable ingredients like honey, fish sauce and coconut aminos or Tamari sauce, I ended up using prunes, tomato paste and Chinese five-spice powder, which you don’t often see in other paleo recipes but they really make a difference. You can re-use those ingredients for other recipes, so don’t be afraid of stocking up on new things.
Serving Mongolian Chicken
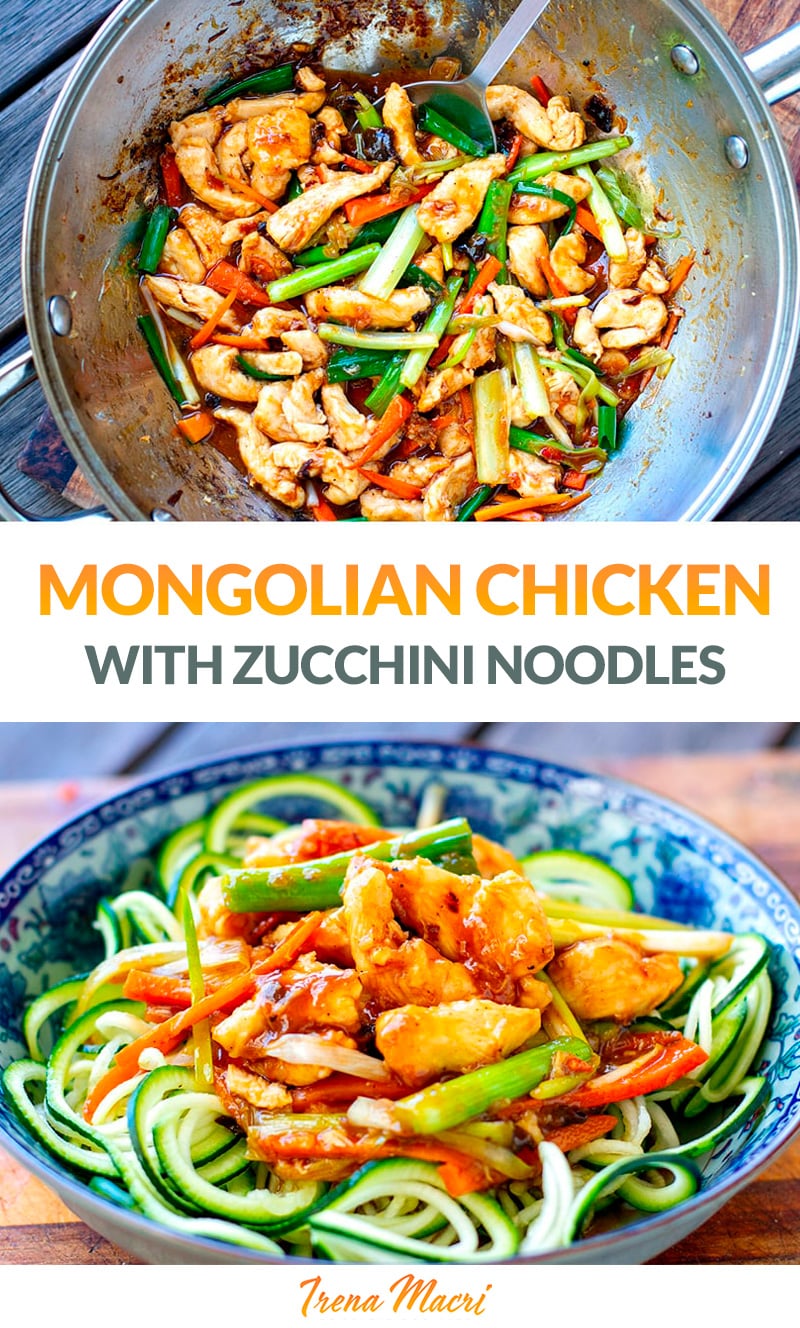
I served the finished Mongolian chicken stir-fry over lightly warmed up zucchini noodles (seriously, you don’t need to cook them) but you could also make some cauliflower rice or steamed greens. Regular rice, brown rice, rice noodles or quinoa can also be used.
I hope you enjoy this dish as much as we did. I’d love to know what you think. Did I get it close to the real thing? Let me know in the comments. See step-by-step photos below the recipe card.
More Paleo & Other Healthy Asian Recipes
- Sweet Potato Glass Noodle Stir-Fry With Shrimp & Bok Choy
- Vietnamese Meatballs With Broccoli Rice (Keto, Paleo)
- Prawn Fritters With Spicy Sriracha Mayo
- Coconut Yoghurt Chicken
Want to Save This Recipe?
Enter your email & I'll send it to your inbox. Plus, get great new recipes from me every week!
By submitting this form, you consent to receive emails from Cooked & Loved
Ingredients
For the sauce
- 1/3 cup Tamari GF soy sauce or coconut aminos (about 7 tbsp)
- 2 teaspoons sesame oil
- 1 tablespoon fish sauce
- 2 tablespoons honey
- 3 prunes pitted, chopped finely
- 1 teaspoon tomato paste
- 1/2 teaspoon Chinese five-spice powder
- 3 tablespoons lemon juice
- 1/4 cup water
For the stir-fry
- 4 garlic cloves grated or finely diced, crushed
- 1 teaspoon grated ginger thumb-size knob
- 1/2 long red chilli sliced finely (seeds removed)
- 3 spring onions/scallions cut into 1-2” long pieces (save the greenest ends for garnish)
- 1 carrot cut into thirds and then sliced into thin strips
- 1 celery stalk sliced into thin strips
For the chicken
- 500 g chicken breast 1 lb., sliced into thin strips
- 1/4 cup tapioca flour starch
- 1/2 teaspoon salt
- 1/4 teaspoon pepper white pepper is ideal
- Oil for cooking macadamia or coconut are best
- 1 zucchini per person for spiralized zoodles
Instructions
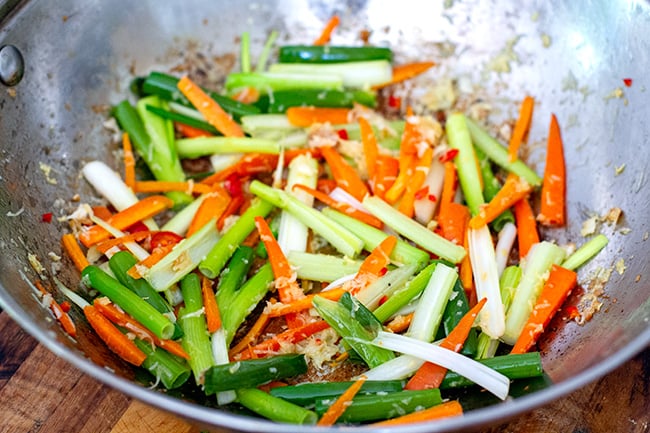
- Dice up all the veggies and aromatics for the stir fry and set aside.
- Prepare the sauce. Combine all ingredients in a bowl and mix well together. If you have a small blender, whiz it up a couple of times or use a spoon or a fork to mash the prunes slightly to incorporate into the sauce. Set aside.
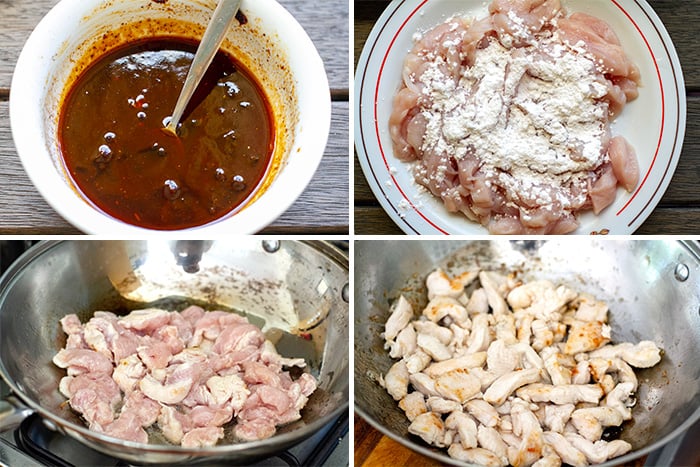
- Prepare the chicken. Cut the chicken into small strips and arrange on a plate. Sprinkle with salt, pepper and tapioca flour. Using your hands, mix it well making sure as much of the meat is coated in the starch as possible.
- Heat 3 tablespoons of cooking oil in a wok or a large frying pan. Once hot, add the chicken and use a stiff spatula the meat apart. Cook over high heat for about 5-6 minutes, stirring every 30 seconds to a minute. Transfer the pre-cooked chicken to a plate and return the wok on the stove.
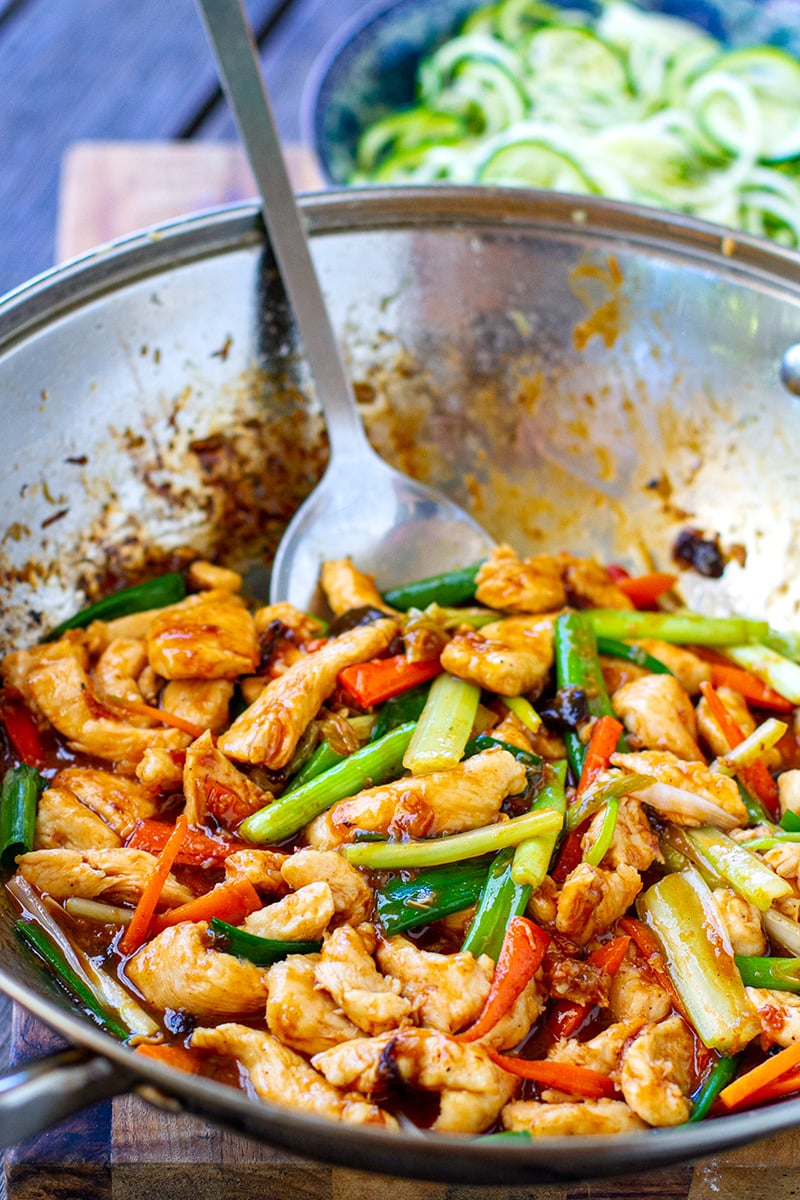
- Finish the stir fry. Keeping the heat on high, add the vegetables, garlic, ginger and chill and another tablespoon of cooking oil. Stir fry for 30-45 seconds (keep stirring!) and then add about 1/3 cup of water. It will start to bubble and will soften the sticky bits on the bottom of the pan. Use the spatula to scrape it off and incorporate into the sauce. Add the chicken back in, stir through and pour in the pre-made sauce, which will mix through with any liquid in the pan.
- Stir-fry the lot together for another minute or two over high heat allowing the sauce to thicken slightly and the chicken to finish cooking. Remove from heat and serve with spiralled zucchini noodles.
- 5. To prepare the zoodles, I simply stirred the spiralized zucchini in a hot pan with a little oil until just warmed through. No need to cook through this vegetable or the noodles will turn into a soggy mess. Serve right away.
Notes
Nutrition
How To Make Paleo Mongolian Chicken With Zoodles
Step 1. Prepare veggies and aromatics set aside.

Step 2. Prepare the sauce. Mix all ingredients in a bowl. If you have a small blender, whiz it up a couple of times or use a spoon or a fork to mash the prunes slightly to incorporate into the sauce. Set aside.
Step 3. Prepare the chicken. Cut into small strips and sprinkle with salt, pepper and tapioca flour. Mix and make sure the meat is coated evenly.
Step 4. Cook the chicken. Heat cooking oil in a wok or a large frying pan. Add the chicken and cook over high heat for about 5-6 minutes, stirring every 30 seconds to a minute. Transfer the chicken to a plate and return the wok on the stove.
Step 5. Finish the stir fry. Keeping the heat on high, add the vegetables, garlic, ginger and chill and another tablespoon of cooking oil. Stir fry for 30-45 seconds (keep stirring!) and then add about 1/3 cup of water. It will start to bubble and will soften the sticky bits on the bottom of the pan. Use the spatula to scrape it off and incorporate into the sauce. Add the chicken, stir through and pour in the pre-made sauce, which will mix through with any liquid in the pan.
Stir-fry for another minute or two over high heat allowing the sauce to thicken slightly and the chicken to finish cooking. Remove from heat and serve with spiralled zucchini noodles.
Step 6. Prepare the zoodles. I simply stirred spiralized zucchini noodles in a hot pan with a little oil until just warmed through. No need to cook through this vegetable or the noodles will turn into a soggy mess. Serve right away.

Love all of the flavors you have going on here. Super tasty but also healthy – yay!
This is so delicious! I especially love the sauce 🙂
Stir fry perfection. I just love the sauce! A great, quick dinner!
That looks so delicious! Now I’m hungry…
Those colors! That sauce! This is making my mouth water. Can’t wait to try this.
Healthier versions of classic favorites are a must. I’m super eager to try this one. It sounds very authentic and delicious!
What a fantastic infusion of nutrition! I can’t believe how healthy you made this chicken – definitely something I need for my menu. Thank you!
I made this last night and it was a hit in our household! Love how flavoursome and healthy it is!
So healthy and delicious! Can’t wait to try the sauce, too!
I love these bright colors, looks delicious!!
I love Mongolian Beef, so this is going to be an instant hit! Also super excited to try your paleo version of hoisin sauce, so creative!
Yum! This is basically my perfect meal in a bowl. I love veggie noodles and a big bowl of protein and veggies. So satisfying!
Can I freeze the chicken when cooked, as I live on my own. The dish looks delicious
Yes, however, some of those veggies might not survive the freezer, as in they might be a bit too soft once defrosted. The sauce and the chicken will be fine though.
I love this recipe, it’s a regular in my house. Very tasty and healthy .